
Last Updated on 2 months
The majority of modern automobiles employ replacement bulbs with plastic lenses that are more susceptible to deterioration instead of the more resilient glass sealed-beam units.
According to our measurements, cloudy lenses can seriously jeopardize your safety by impairing your ability to see at night and decreasing the efficiency of your headlights by as much as 80%.
Even the best cars might have nighttime sight problems due to fogging up the headlights, which is dangerous. Not only does this not look good, but it can significantly reduce the amount of light.
The best headlight restorer kits on the market can restore at least 90% of the transparency of the headlights in an hour or less, without the use of any special tools or expertise, and they come with easy-to-follow instructions.
Instead of the more resilient glass sealed-beam units, most modern automobiles employ replacement bulbs with plastic lenses that are more susceptible to deterioration.
Even the best cars might have nighttime sight problems due to fogging up the headlights, which is dangerous. Not only does this not look good, but it can significantly reduce the amount of light.
As the average age of all the cars on the road continues to increase, headlights with an old, misty, or hazy appearance are becoming more prevalent.
In the following article, we have given a list of the best headlight restorer kits that might suit you well according to your needs and requirements.
We’ll give you an overview of the functionality, attributes, and user feedback of each product as well as some advice on how to choose the best headlight cleaner for your vehicle.
Things to Consider Before Buying the Best Headlight Restorer Kit:
There are a few increased headlight restoration products on the market, and each has advantages and disadvantages. You should take a few things into account when selecting the best headlight cleaning for your car.
The finest headlight restoration kit currently available is this one. Your headlamp may once again seem brand new thanks to the ideal trade-off between cost and performance.
Choice in Kit:
Depending on your degree of expertise with do-it-yourself automobile repairs, you might only want a bottle of polish to fix your headlights if you already have supplies on hand like sandpaper or microfiber applicator cloths.
If not, you should probably get a complete headlight lens repair kit.
Working:
It can be challenging to restore your headlights, and you might need to repeat the cleaning procedure several times to achieve the ideal results.
While a drill extension can speed up the process, cleaning difficult-to-reach places like corners may prove challenging. In any case, you ought to schedule a couple of hours to fix your headlights.
Sunlight Protection:
Some products do a great job of restoring headlights from severe discoloration, but the main cause of discoloration is UV rays from the sun.
If you don’t buy a product that offers a strong headlight coating, you could end up repeating the process in a few months.
Directions to use restoration kit
DO’S:
- Before you go, wash the entire vehicle. By doing this, you can prevent scratches from being made by dirt getting into your sanding.
- Apply several inches of water-resistant painter’s tape to the area around your headlights. It will shield your paint from chemicals as well as unintentional sanding.
- Clean your headlights, and routinely check your work. When you’ve sanded to an even surface, it can be challenging to tell.
- To work inside or on a cloudy, cold day, choose.
DON’TS:
- Combine various chemicals. When some of the Dry rot got on other sections, we discovered this the hard way. We had to redesign the headlamp as a result of it discoloring the other three goods.
- Do not allow anything to touch your sanding pads. A small amount of glue that we removed from gaffer tape and inserted into a mother’s pad stuck to the plastic, heated up, and cracked the headlight.
- Before you are completely prepared to use them, don’t open any chemicals. The majority of kits are sparsely stocked with single-use wipes.
Usage of restoration Kit
If you don’t take the time to utilize a headlight restoration kit properly, it won’t matter what kind you buy. But you need to know how to utilize it in need to use it properly.
We’ll provide you with a quick tutorial on using a headlight restoration kit in this place as a result.
Ideal Location
Finding the ideal place is essential while trying to recover your headlights. You must choose a location with sufficient illumination, but it shouldn’t be in the sun.
Additionally, for the greatest outcomes, make sure the temperature is well above freezing.
Headlight Assembly
To get the headlight assembly ready for restoration, there are a few things to undertake. You should first give the headlights a light cleaning. Instead of using the cleaning agents in the kit for this, simply wipe off any dust or grime that has amassed on the headlight.
Tape the headlamp assembly second. By simply taping the area surrounding the headlight assembly, you may create a buffer to prevent the chemicals or sandpaper from touching the paint.
Wet Sanding the Headlights
It’s time to wet sand the headlamp after the headlight assembly is ready. This is a frequently neglected stage, but if you want the finest outcomes, you shouldn’t skip it.
For each headlamp assembly, use a 14″ section of 800-grit sandpaper. To aid in the restoration process and give you a crystal-clear appearance, you want small sandpaper nicks all over the assembly.
To get the most out of your sandpaper and achieve the most consistent results, moisten the headlight assembly as well as the sandpaper before beginning to sand it.
Remember that you’re not attempting to overly sand the headlamp down at this stage, nor are you trying to smooth it out.
Cleaning Compounds
It’s time to give the headlamp a thorough cleaning now that you’ve done prepping and wet sanding it. For optimal results, use the cleaning agent that is included in the restoration package.
You can use some Dawn dish soap if your package doesn’t include one, but don’t anticipate getting the same level of results.
During the process, don’t be timid and try your best to thoroughly clean the headlight, making sure not to overlook any areas. Although it can take a bit longer, doing it correctly will guarantee consistent results.
Drying the Headlights
Before continuing, make sure you take the time to completely dry them. Drying off the headlights with a microfiber cloth will avoid wet spots from accumulating and won’t do any damage to the headlights.
Coating Solution
The restorative coating should be used. Every restoration kit on our list includes this chemical, which is the component that fixes the headlights.
While we’d love to outline the exact steps you must take for each kit for you, the reality is that it varies depending on the product.
To achieve the best outcomes, carefully read the instruction booklet and adhere to its recommendations.
Additional Coating
Certain parts may inevitably have more oxidation than others, and often just one application isn’t enough to adequately cover the problem regions.
You can have a flawless finish throughout and solve that issue with a second coat.
Second, a second application adds another layer of UV protection for your headlights. Your headlights will look newer for longer thanks to this extra layer of protection, which will postpone the development of new oxidation.
Additionally, it lessens the possibility that oxidation would progress to a point where repairs are impossible. Even if everything looks brand new after the first application, apply a second layer.
Observation
Before putting your car on the road, wait 24 hours. Everything has time to dry and cure as a result. Dirt, muck, oxygen, UV radiation, and just much everything else can still pass through the compound if you reach the road too soon.
Even though it might not seem like a big concern, it can cause headlights to wear out too quickly and undo all of your hard work.
It would be ideal if you could leave your car in an indoor garage for the next 24 hours, but if not, try to keep it away from traffic, rain, and other severe weather until everything clears up.
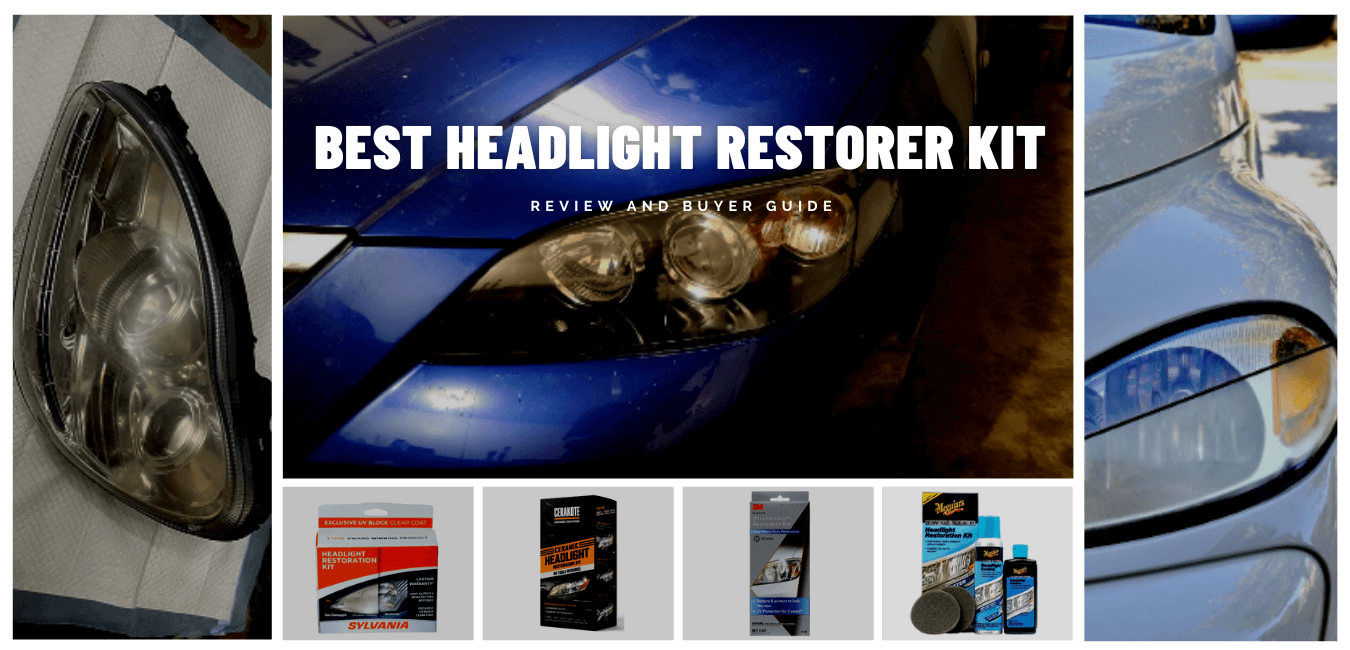
6 Best Headlight Restorer Kit
| Image | Product | Details | Price |
|---|---|---|---|
 | Cerakote Headlight Restoration Kit | No tools required | Check Price |
 | Sylvania Restoration Kit | Protects headlight | Check Price |
 | 3M Ultra Headlight Restoration Kit | Shortcutting time | Check Price |
 | Meguiar Headlight Restoration Kit | Simple process | Check Price |
 | NuLens Headlight Renewal Kit | Easy to buy, affordable | Check Price |
 | Turtle Wax headlight restoring kit | Quick application and results | Check Price |
Cerakote Headlight Restoration Kit
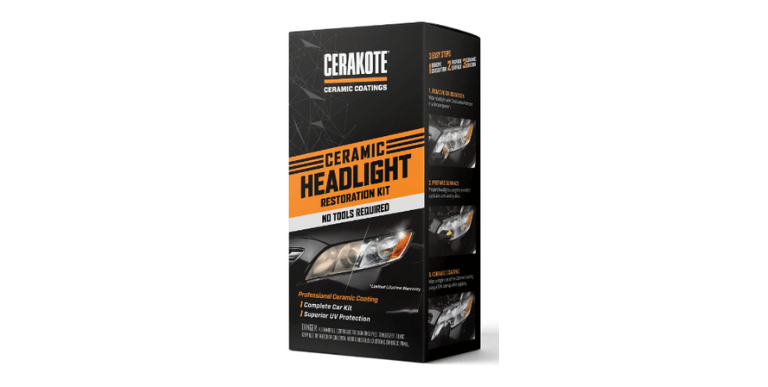
An oxidation removal wipe is the first stage in the three-phase procedure used by the Cerakote Ceramic Headlight Restoration Kit.
The next step is to apply a long-lasting ceramic coating to preserve your car over the long term after washing and drying your headlamp and sanding.
Gloves and a sealant are included in this set, but a towel is not. Utilizing the Oxidization Remover wipe over the dim headlights is the first step.
Seeing the yellow oxidization disappear on the wipe is quite pleasant. The lens is then wet-polished using the Surface Prep Disc.
The Cerakote Ceramic Headlight Restoration Kit is just what you need if you don’t want to spend a lot of money but need your headlights to look a little better.
You’ve probably heard of ceramic coating and detailing products if you enjoy cleaning your car.
A ceramic headlight restoration kit from Cerakote is designed to chemically bind to your headlights and offer UV protection for the duration of your car ownership.
For as long as you own the vehicle, the firm provides a limited lifetime warranty on the coating. If not, they’ll pay for the subsequent kit out of pocket.
Compared to the Rust-oleum kit, Cerakote made the lens more transparent, and its applicator makes it simpler to work with. It’s bigger and more accessible for me to hold.
The grit number is prominently displayed on the reverse of each sanding disc, which is the same color as the discs themselves.
Position: Front
Lens Color: Clear
Dimensions: 4 x 3 x 8 inches
Weight: 1.76 ounces
- It includes pre-moistened ceramic coating wipes,
- oxidation removal wipes,
- surface preparation pads,
- discs.
- It can combat advanced oxidation.
- There are plenty of materials for potential future applications.
- Lifetime limitation on warranties
- Simple application process
- No tools required
- Layers of the UV production
- Results differ on highly oxidized headlights
- Expensive
Why Choose This:
- It requires no tool for its assembly.
- It provides UV protection and reduces damage.
- A highly trusted company for the production of restoration kits.
- Great project to have for a DIY project.
Sylvania Restoration Kit
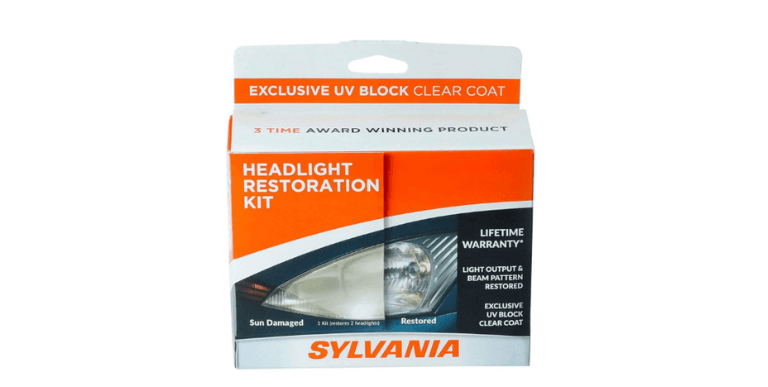
Spraying on the surface activator to dissolve the plastic is the first step in utilizing the Sylvania product. The initial clear coat is then removed using sandpaper, and a polishing chemical is then used.
The final step is to use a UV blocker to stop further sun damage. Its three-step procedure yields some of the highest clarity results, demonstrating its ability to combat severe yellowing.
It is the greatest headlight restoration kit overall because of this, in our opinion.
Although it performs an excellent job of shielding your headlights from UV radiation over time, it is not the best restoration kit available. It’s probably not the greatest option for you if your headlights already have a lot of fading or fogging.
The most enhanced illumination and look with no discernible deterioration over time.
Using progressively finer emery paper grades, rinsing, and a final coat of UV-blocking polymer coating—which is best applied while wearing rubber gloves and in a well-ventilated area—are among the six processes that make up this process.
It lowers the possibility of harming neighboring paint by being applied by hand. Although the Sylvania sanding papers are larger than those offered with some other products, making them easier to use does not guarantee the greatest results.
It is effective and can almost completely restore the showroom purity of headlights that have been yellowed, faded, or oxidized. With a small amount of work, you can fix headlights that have been damaged by the sun with this kit.
Item Weight: 4.8 ounces
Dimensions: 8 x 2 x 6 inches
Exterior: Machined
Model Number: HRK.BX
- Comes with a surface activator,
- clarifying compound,
- UV-blocking clear coat,
- three sheets of waterproof sandpaper,
- three applicator cloths,
- one vinyl glove
- UV protection
- Lifetime warranty
- Easy to apply
- Protects headlight
- Plenty of applicators are present
- Durable UV-blocking film
- Hard rubbing compound
- 4-6 hrs curing time
Why Choose This:
- The lifetime warranty comes with two uses of headlight assemblies.
- Removes extra corrosion and avoids turning the vehicle yellow, hazy and dull.
- Takes a maximum of 30 minutes to get the job done.
- It is the best available choice to prevent fading and fogging.
3M Ultra Headlight Restoration Kit
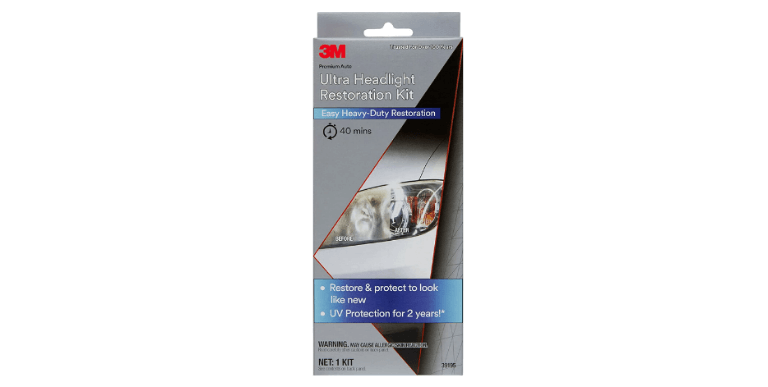
3M Ultra headlight restoration kit is the least expensive choice on our list and by far the simplest to use. This kit employs wipes to clean the headlights instead of the liquid chemicals and rags used by the majority of other kits.
There are many advantages to this equipment. With the use of 3M’s dry sanding at 500 and 800 grit and UV wipes, we were able to understand what was happening with the lens and ended up with headlights that looked brand-new.
Simply cleaning the headlamp will result in noticeable gains and clarity. Although these wipes offer UV protection and some fog clearing, they don’t perform as well as other kits.
According to 3M, their coating just needs an hour to cure and is excellent for up to two years. The drill attachment has a substantial, supple cushion that is easily curved around the headlight’s contours.
To prevent scratching your paint during sanding the headlights, this kit also comes with 3M automotive masking tape. Some models appear to be particularly prone to headlight oxidation, and these models might benefit the most from this kit.
This keeps the results going for longer than any other product and keeps future dirt and grime from clogging the headlights.
Item weight: 5.6 ounces
Dimensions: 4 x 3 x 9.25 inches
Position: rear
Model: 3M Ultra Headlight Restoration Kit, Easy Heavy-Duty Restoration for Car Headlights
- The kit contains masking tape, light sanding discs, and wax protectants.
- It can also be used on plastic lenses.
- These professional-grade products and tools are assembled at a very high level.
- Light abrasives are used in kits to maintain vehicles’ excellent appearance.
- This abrasive method removes buildup and discoloration without harming the surface of plastic lenses.
- Shortcutting time
- Thick padding on the attachment
- Restores 70% of clouded headlights to a new state within a month
- Expensive
- Requires proper attention to avoid scuffs
Why Choose This:
- It comes with a two-year protection warranty.
- It is a kit that requires no tool and can be used with a common household drill.
- It is a little more thorough and hence a little more expensive, but worth buying.
Meguiar Headlight Restoration Kit
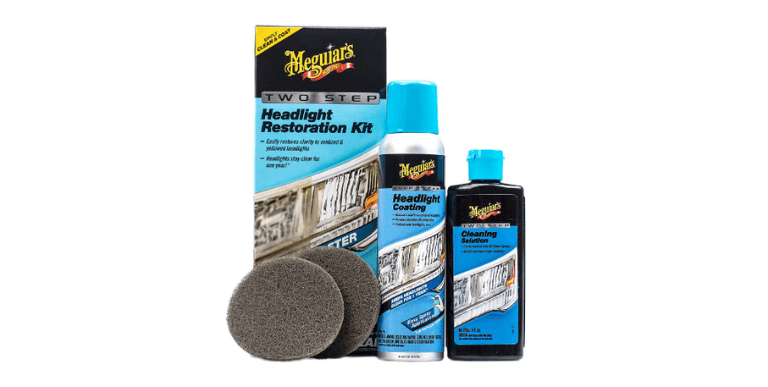
Meguiar’s headlight restoration kit differs slightly from the majority of the competition. You haze the headlight evenly with the cleaning solution, clean it with a mildly harsh cleaning pad, and then coat it twice with the aerosol protectant.
This is arguably the cleanest option because it doesn’t produce the dust of dry sanding or the muddy runoff of wet sanding.
That kind of is true if it seems a little too wonderful to be true. To achieve an even haze, Meguiar claims that you will need to apply, scrub, and wipe off the solution several times.
Use newspaper and painter’s tape to mask off a large area of your car if you don’t want clearcoat spots on the rest of it.
The results we’ve seen don’t look as clear as our top two options with numerous grades of sandpaper because it’s a rather delicate technique, and it won’t work well on really hazy or damaged headlights.
The coating should last for approximately a year, which is not as long as most others, but the large aerosol container of clearcoat allows for preventive touch-ups a few times a year that will extend its lifespan significantly.
Color: Two Step
Specific Uses For Product: Headlights
Vehicle Service Type: Automotive
Position: Front
Lens Color: Clear
Lens Material: Plastic
Dimension: 9.12 x 3.55 x 2.55 inches
Item Weight: 13.9 ounces
- It is toll-free.
- Extremely easy to use.
- It comes with all the necessary tools to clean the car headlights.
- The clear polycarbonate is covered with a headlight coating to enhance optical clarity and offer dependable UV protection.
- Least messy kit
- Aerosol clearcoat
- Simple process
- 24hrs long cure time
Why Choose This:
- The clear polycarbonate is covered with a headlight coating to enhance optical clarity and offer dependable UV protection.
- When the entire headlight is uniformly frosted, the headlight has been thoroughly cleaned.
- Your headlights’ clouding, yellowing, and rust are removed, leaving them with a clear finish.
- A 4 oz bottle of headlight cleaner, a 4 oz canister of headlight coating, and two pads are included in this car care kit.
NuLens Headlight Renewal Kit
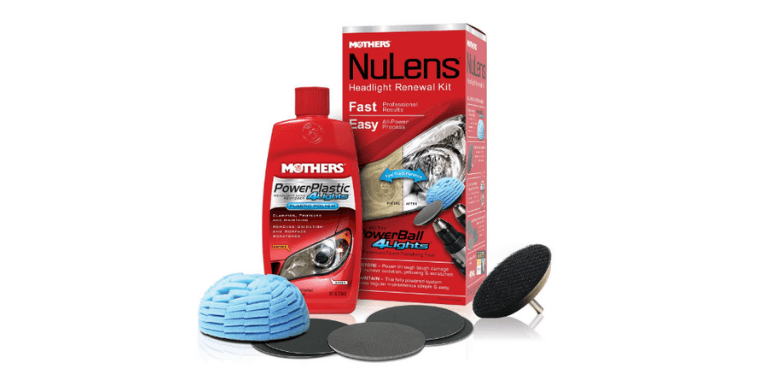
The NuLens Headlight Renewal Kit strives for excellent outcomes and a slow restoration process. Its inclusion on our list of the top headlight cleaners is due to this.
You might only need to polish your headlamps if they only have minor oxidation. However, this kit still does the trick for minor blemishes, dirt accumulation, or pitting.
A drill attachment, rough repair discs, a foam ball polish applicator, and polish are all included in the set. You should check the directions carefully as you go with the cleaning process because they specify a combination of dry and wet sanding.
Painter’s tape, gloves, and a microfiber towel to dry your freshly polished headlights are the only supplies you’ll need to bring.
The lens was unquestionably clearer after using Renewal Kit. The printing of the grit on the back is hit or miss, and the sanding discs are all the same color.
On some, it’s simple to read, but on others, a portion of the number is printed on the disc, forcing me to make an educated estimate.
The absence of a sealant makes it likely that the automobile headlights will quickly get cloudy again.
Item weight: 13.4 ounces
Dimensions: 9.4 x 4.1 x 3.4 inches
Model: 07251
Brand: Mothers
- The list contains PowerBall 4Lights Polishing Tool, 8 oz. PowerPlastic 4Lights Liquid Polish, 3-inch Backing Plate, Restoration Discs, Instruction Sheet.
- Efficient to save money
- Improves the resale value of the vehicle
- It can handle a lot of oxidation.
- Easy to buy, affordable
- Handles oxidation well
- It improves the resale value.
- Lack of sealant
Why Choose This:
- It includes a foam polishing ball, three repair discs, a disc-holder drill attachment, and polishing fluid.
- use a power drill for simple application.
- There are plenty of materials for potential future applications.
Turtle Wax headlight restoring kit
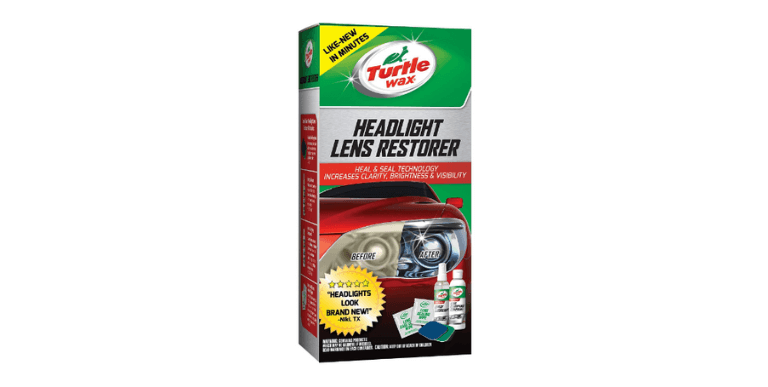
Since it promises results in as little as five minutes, the Turtle Wax Headlight Lens Restoration Kit stands out as one of the fastest-acting DIY kits available.
However, it doesn’t go through the further step of adding a protective film to ward off future rust but still provides a very complete freshening equivalent to the top solutions.
Since clear headlights have a significant first impression on prospective buyers, the reasonably priced Turtle Wax headlight restoring kit is excellent for quickly updating the appearance of an older car.
It might also be a good value if you’re selling a used car or even taking it to Carmax. Overall, the Turtle Wax Headlight Lens Restorer Kit is simple to use and works on a variety of materials, including lenses, plexiglass, and plastic.
The greatest jump starter is another essential car piece of equipment.
Item Form: Spray
scent: No scent
Specific Uses For Product: Car
Item Volume: 4 Fluid Ounces
Dimension: 5.4 x 7.77 x 16.84 cm
Item weight: 318 g
Net Quantity: 1 Quantity
- It is not a big shark for the pocket.
- Takes almost 5mins to remove the yellowness from each headlight.
- Fine finish polish to restore headlights.
- The Kit comes with every necessary instrument for eradicating difficult plastic oxidation.
- Lens Clarifying Compound, Spray Lubricant, and Professional Wet Restoration Pads are all included in the kit.
- Quick application and results
- No power tools are needed
- Variety of polishing abrasives
- Smaller abrasive pads
- The UV-blocking protection film is not included
Why Choose This:
- In a two-step process, active sealant wipes stop future fading and yellowing.
- Lens Clarifying Compound effectively eliminates surface discoloration and can be sufficient to regain clarity.
- Graded sanding pads and fine finish polish fix headlights that have become dull, faded, and yellowed.
Frequently Asked Questions (FAQ)
There are various types of kits, including dry and wet sanding, wipes only, a drill attachment, and hand sanding. In addition to determining which ones functioned the best, we also bought a variety of these from the best-selling manufacturers to determine which approaches we preferred and which were most effective for various purposes.
The best headlight kit is the Cerakote Ceramic Headlight Restoration Kit. For a good reason, the 3M Headlight Lens Restoration System is also among our best picks, and it will work marvels on your car...!